How To Tile A Bathroom Floor – A Simple Guide With Useful Tips
How you ever considered installing floor tiles in your bathroom by yourself? Yes, that’s something that you’d usually need a professional for but, as it turns out, it’s entirely possible to manage such a project by yourself if you have the right tools and if you do some research before you actually start the project. The difficulty level is medium but can vary depending mainly on the type of tiles you want to use. Here’s a short guide on how to tile a shower or a bathroom floor:
Calculate the square footage
Before anything else you should calculate the square footage of your bathroom and for that you’ll only need a measuring tape. This step is super easy if the bathroom isn’t divided into separate areas and has a unified floor plan but if that’s not the case then just divide the floor into smaller areas and measure those separately. Calculate the total and be sure to add an extra 10% when ordering the supplies.
Get some samples
Next it would be nice to get some samples of different types of tiles or different colors just so you can get a feeling of how they’ll look like on your bathroom floor. Also, choose the grout. You have several options here. You can choose to match the grout to the tiles which would help to hide any imperfections or irregularities or you can choose different colors that contrast with each other or complement one another.

Install cement boards
The next step would be to install cement boards. This is done in order to ensure proper floor thickness and a smooth and seamless transition between rooms as well as to prevent mold in areas with a lot of moisture. You may not need to do this if the floor is already prepped and ready to receive the tiles.
Determine the layout

![]()
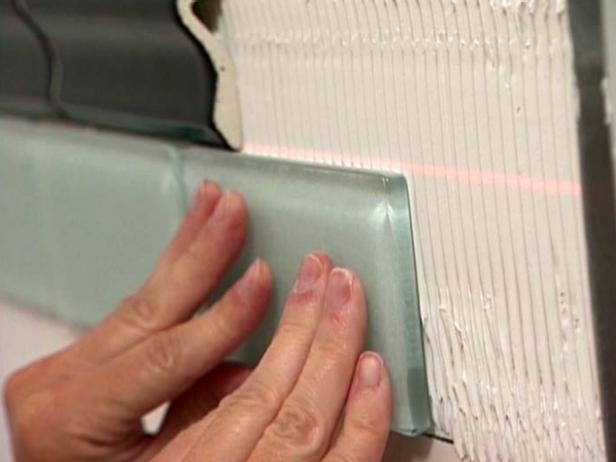
Lay the tiling
Finally, apply thinset and lay the tiles using spacers. Keep in mind that this time the placement is final. Use a level as you lay more tiles to make sure you’re doing this right. After 24 hours )minimum), remove the spacers and apply grout to fill in the lines. Let the grout sit for a few minutes and then wipe off the excess. You should also apply sealer at the end, considering that the bathroom floor is exposed to moisture and water constantly. You can find additional details in the guide featured on wayfair.
The tools you’ll need:
There are a lot of different types of tiles to choose from with many variations of color, texture or pattern but no matter what you select you’ll need to be prepared for installation and that means you’ll have to have a few tools:
- a hammer
- a diamond blade wet saw
- a hammer drill
- a notched trowel
- a margin trowel
- a rubber float (for grout)
- a level
- a measuring tape
- fiberglass tape
- a wooden block
- sponges
- a foam brush
- gloves, safety goggles, knee pads and other such accessories
How to Tile Bathroom Walls and Shower/Tub Area
Licensed contractor Amy Matthews shows how to install tiles in a bathroom shower area and the walls to transform a tired old bathroom into a classic Art Deco retreat.
STEP 1


Plan Project and Select Tiles
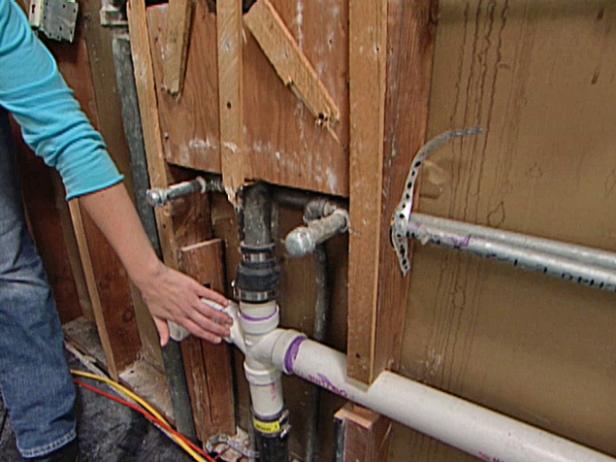
In our project, we brought an old '70s bathroom into classic Art Deco style. We removed a wall where an old single vanity used to be in favor of a double vanity. To get the plumbing ready for the new vanity, a vented T was added (Image 1) and the drainpipe extended.
Since the backerboard is already installed around the tub, the tile is ready to be installed. In our project, the homeowner met with a tile expert for design advice and was impressed by handmade 3x6" subway tile. Compared to mechanical or machine-made tile which are lower priced, handmade tiles feature more pooling of the glazes at the edge and appear more textured (Image 2).
In our project, the homeowners decided to go with machine-made subway tile (about $2 to $4 per square foot) versus handmade tile (approximately $13 to $30 per square foot). Machine-made tile (Image 3) is easy to install yourself because the tile is beveled out. As a result, you don't have to use tile spacers. Both the subway tile and accent tiles we used are self-spacing in this way so they don't require spacers. These tiles have a small lip that creates a uniform gap between the tiles, forming perfectly spaced grout joints.
Note: Finishing options include top caps, called listellos, and the use of accent tile between the top cap and field tile. Field tiles are those in the main field of a floor or wall and they're flat in contrast to trim tiles which are shaped. Border tiles border around field tiles while accent tiles are used to add interest, usually intermixed with field tiles.
Before you begin to install the tile, figure out the layout of your tile scheme after measuring all areas to be tiled as well as the tiles. Make a diagram of each wall to help you decide placement of tiles (Image 4). Before you lay the field tile, determine where the accent and border tiles will go.
In our project, we used white subway tiles in the field areas and green glass tile as an accent border for the shower area and walls.
Black accent tiles (Image 5)were intermixed in the floor field tiles.
STEP 2

Prep the Shower Area for Tile Layout
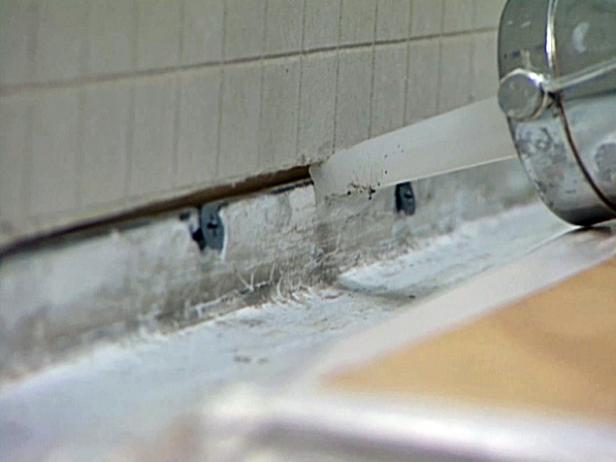
To start tiling, prepare by running a bead of silicone caulk around the perimeter of the area you are tiling to seal it (Image 1). Use the back of a plastic spoon to smooth the caulk.
Use a wet saw with a diamond blade to cut all the tiles. In our project, we cut two chair-rail tiles at a 45-degree angle to form a picture frame corner to border the shower. Tilting the saw base to 45 degrees gives the perfect cut.
Note: Diamond blades give a professional cut because they allow for more precision versus a score and snap tile cutter.
Use a 360-degree laser level to mark a line for laying the tiles.
With a 3/16" V-notched trowel, spread mastic just under the laser line and down the side of the tub wall to a small area.
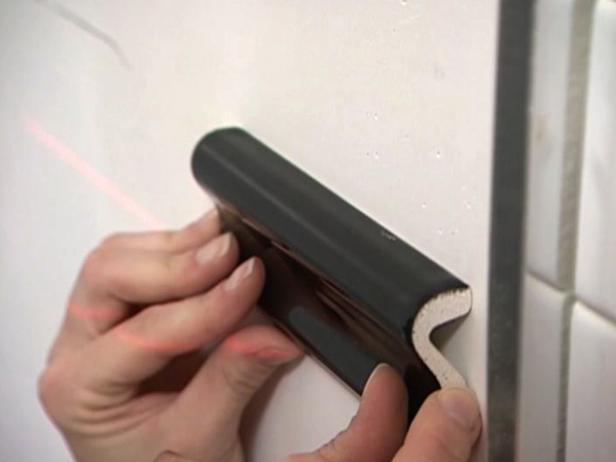
Once you are ready to lay the tile, start at the corner, with the chair rail border (Image 2).
STEP 3
Set the Tile Rail
Start in the corner and make a miter cut at a 45-degree angle, otherwise it will be too short.
Make a series of reference marks for the top and bottom tiles (Image 1), that way you will know how many tiles to put on the wall. Set the wet saw table to 45-degrees to make miter cuts.
Use a 3/16" v-notched trowel to apply the mastic adhesive to the wall. Use mastic adhesive instead of thinset because the mastic creates a strong instant bond so the tiles won't slip down the wall once they are in place.
You can see why the laser line is so handy, a pencil mark would be covered by the mastic (Image 2).
STEP 4


Apply the Field and Accent Tiles
Once you determine how many inches from the floor to place the border tile, use the laser level to continue to mark around the room. Mark the laser line so that once you start to set the field tiles you will know when you're ready for the accent tiles.
To lay out the tile, stagger the joints so that you have a classic brick style (Image 1). You don't want to set the tile flush with the wall because you will end up with slivers or small pieces of tiles at the edges.
Slide the tile in from the corner and if you have an irregular piece, split the difference and cap the corners with small pieces you cut to size (Image 2). This will give you a nice, clean line throughout the whole wall. For the second row, cut another tile so you can continue the staggered joint and then fill in the rest.
To set the tile, apply an even coat of mastic on only a small portion of the wall at a time. You have about five to 10 minutes to set the tiling, so don't apply too much adhesive over a large area. Again, apply the tile with a slight twisting motion.
The accent tiles go on the same way (Image 3).
Allow at least 24 hours for the adhesive to dry before grouting. To prepare for applying the grout, tape to protect any neighboring walls or wallpaper.
Readmore: How to Install Tile on a Bathroom Floor
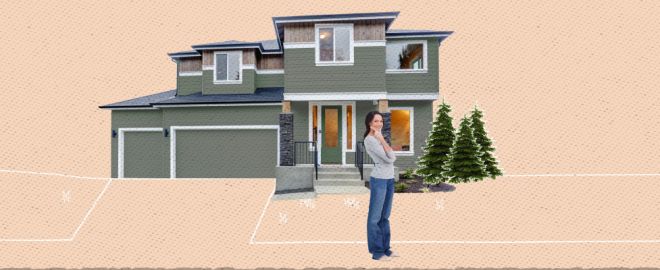
2020 Average Costs of Home Improvement Projects
The national average for costs recouped from a minor kitchen remodel is almost 78 percent, according to Remodeling magazine’s 2020 Cost vs. Value Report - home improvement services
You’ve been thinking about remodeling your kitchen but worry that you won’t be able to recoup the costs if you sell your home. Or maybe you have an endless list of home improvement projects, but you’re just not sure where to get started — or how much you can expect to spend.
Using the Remodeling 2020 Cost vs. Value Report, we looked at the national averages for job cost, resale value and cost recouped on some mid-range home improvement projects.
Garage door replacements give homeowners one of the biggest returns, with more than 94 percent of the cost recouped when the house is sold.
The reason? “Curb appeal,” says Barry Brownstone, owner of Sears Garage Solutions in the Chicago area. The garage “is the largest part you see when you pull up to a house—it’s the focal point of the house.” Brownstone especially encourages those thinking about selling their house to replace an old garage door with a new one that has windows. “It’s a great selling point.”
The most popular garage door style right now—and the least expensive—is a traditional steel door, Brownstone says. Sears also offers carriage-door styles in custom wood and steel, as well as premier carriage-door styles.
If a kitchen remodel is on your mind, but you’re worried about the cost, think about a smaller project. A minor mid-range kitchen project has a much better payoff (recouping almost 78 percent of the cost) than a major mid-range kitchen project (recouping almost 59 percent), according to the 2020 Cost vs. Value Report.
Check out the chart below to see how much home improvement projects will help increase your home’s curb appeal. 
Still wondering what projects might offer the best payoff? Schedule a free in-home consultation to get things started today.
4 Bonus Tips
Check out these maintenance tips to help keep your home in good shape.
Tip: Check your garage door and opener for the safety sensors, sometimes called “electric eyes.” If your garage door is older, or if it has not been properly maintained or installed, the safety sensors might not be functional. Properly connect and align the sensors or replace them.
Tip: Deal with drafts promptly. Touch up windows with caulk to cut down on energy bills.
Tip: Visually inspect your room from the ground twice a year. If you see moss or algae, call in an expert.
Tip: Spring is a great time to test the weather-stripping on your exterior doors. If you feel a draft when you run your hand along the bottom and sides, replace the stripping.
10 Common Questions About Window Replacement
When was the last time you looked at your house from the outside and said, “Wow, I love my home’s windows?” Or, have you recently commented that there was a cool draft or hot air seeping inside your home through the windows? If either is the case (or both!) then perhaps it’s time for home improvement services
Whether you’re looking for new replacement windows for energy efficiency or to spruce up the look of your home, the experts at Sears Home Services are ready to handle your job. If you’re like most homeowners, the mere thought of a big window project is daunting and you don’t know where to begin. Laura Elliott, Product Manager at Sears Home Services answered some of the top questions that customers ask.
1. What type of windows can I buy from Sears Home Services?
We sell many different shapes and styles including garden windows, patio doors, double hung, geometric, end-venting sliders, double sliders, bay window, bow window, awning and picture window.
2. With so many types of windows offered, how will I know which windows to buy?
When it’s time to install new windows, we invite you to schedule a free at-home consultation with a Sears window expert. Our expert will explain your options, so you can choose the windows that are right for your house. Choose among three levels of quality—good, better, best—to find the replacement windows that suit your budget.
3. Are Sears windows energy efficient?
All Sears home replacement windows are ENERGY STAR® rated,, which means the windows meet specific U-value and shading coefficient ratings for one or more regions of the country. Ratings vary by window or door style, glass type and the design.
4. Do I have to replace all windows at one time?
No! We can do as few as two to three windows at a time, but please note that handling all of your home’s window replacement at one time may offer you savings.
5. How long does a window installation job take?
Once the windows are ordered and delivered, installation takes roughly one to two days depending on the number and type of windows. Special windows and large homes will take additional time.
6. What is the average cost of windows from Sears Home Services?
Prices depend on the window shape, type and style. Our expert will explain your options, so you can choose the windows that are right for your house and budget.
7. Do I have to pay for a Sears window replacement or installation in full?
We offer flexible payment options. Get it now, pay later. We offer low monthly payments, instant credit and financing.
8. Are replacement windows installed by Sears guaranteed?
Yes! All work is guaranteed by Sears and covered under trusted warranties.
9. When I hire Sears for a windows project, what do I have to do to get the project started?
We take care of everything from permits and scheduling to product delivery and inspections. We work as a team from start to finish both locally and centrally.
10. There are many window companies out there. Why should I choose Sears for my window replacement?
We’re committed to your satisfaction. Home Advisor awarded us Best of Home Advisor 2019, honoring Sears Home Services for extraordinary quality of work practices, customer service, ratings and reviews, and overall value.
Are you ready for new windows but need help deciding which windows are right for your home?
Call or click to schedule your free in-home consultation for windows replacement and installation service. You’ll love how your new windows from Sears Home Services make your home more attractive and energy efficient.